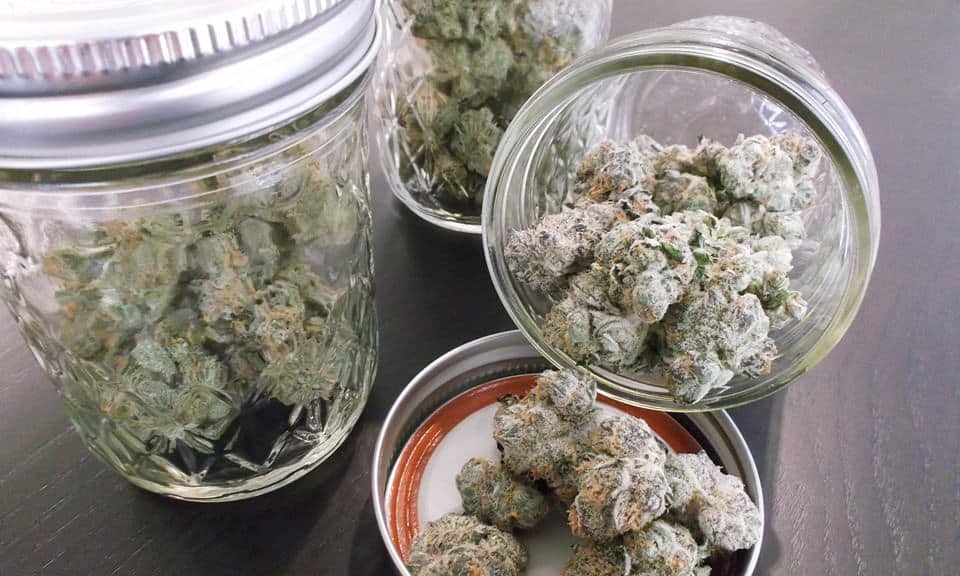
Drying and curing cannabis are the last two things to do after a big chunk of all the work is officially complete. One of the biggest mistakes ever made in the cannabis industry is assuming the work is done as soon as the crop has been chopped down and harvested.
How you dry and cure your freshly harvested cannabis plants does matter, so follow this complete guide if you’re looking for taste, flavour, and potency from your next crop.
What’s the difference between drying and curing?
Drying and curing are often lumped together as if they’re the same, but they’re actually two different things, so stop using them interchangeably.
Cannabis drying is the initial process of, well, drying the cannabis flowers to get rid of moisture. It’s all about drying fresh cannabis buds and getting rid of (or at least drastically reducing) moisture content within them so that they can be smoked, vaped, or whatever you plan to do with them the right way.
This is usually done by hanging branches or laying the buds out flat on drying racks and keeping the branches or buds in a climate-controlled room with the right humidity level (more on that later) for a certain amount of time.
With curing, the main goal is preservation. After harvesting, buds don’t just contain moisture, but also excess sugars and starches. These can attract bacteria, and curing helps to break down all that excess stuff so that you can keep your weed for longer (as long as 2 years if stored in a cool dark place).
The other good news about curing is that it helps to create stronger smells and flavours. It’s done by placing trimmed buds in an airtight container for 2+ weeks, but the longer, the better.
Why dry cannabis before curing?
The first thing to know about how to dry and cure cannabis is that drying always comes first. There’s literally no point in curing if the buds aren’t dry enough because curing can’t happen without low moisture levels.
If you don’t go through a lengthy drying process first, you’re running a huge mold risk. Putting wet cannabis buds into mason jars, screwing the lids on tight, and waiting a few weeks is just asking for mold, so drying beforehand is 100% necessary.
You might be wondering, why can’t I just enjoy fresh flowers, moisture and all? Well, technically you can, but fresh flowers don’t produce the same level of psychoactive effects as dried marijuana. Plus, it’s really hard to smoke or vape fresh cannabis buds, and if you manage to, the smoke is super harsh.
How do you get the best tasting buds?
To get aromatic buds with a nice taste that rival the top shelf dispensary strains, the key is to go slow. When you dry buds at a nice slow pace, this allows them to maintain that nice smell you’re looking for.
The time it takes to dry can take anywhere from 3 to 15 days depending on cannabis bud density and drying room conditions. The sweet spot for the best tasting buds is between 7 and 10 days – anything less than a week usually means you sped through the process too quickly.
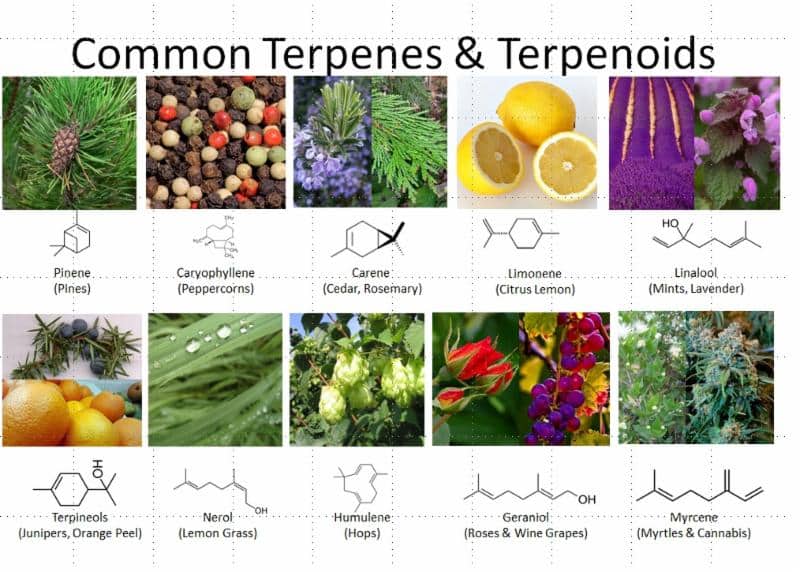
Another key point is to always focus on your relative humidity levels when drying. A lot of people just assume that keeping the room dry at desert-like humidity levels is the way to go, but that assumption is completely wrong. Maintaining medium humidity prevents mold and protects trichomes, and trichomes play a massive role in terpenes, cannabinoids, flavours, and aromas.
The last general tip to follow is that you should never skip straight from drying to consuming. Once again, you technically can, and a lot of you will probably be tempted to because waiting another two weeks to try the final product can feel unbearable.
But just remember, curing your bud is the final step in locking in those skunky, earthy, or fruity smells and flavours. Not to mention it extends your weeds shelf life drastically.
Drying Cannabis the Right Way
In that heading above, you see how we included those 3 words “the right way” at the end? That’s because a lot of growers go through the drying process, but they go about it all wrong.
Getting rid of that moisture content involves striking the right balance of time and humidity control. Then you also have to factor in things like temperature and lighting, so needless to say, there are a lot of wrong ways to do it. Here are the 4 main steps for doing it the right way:
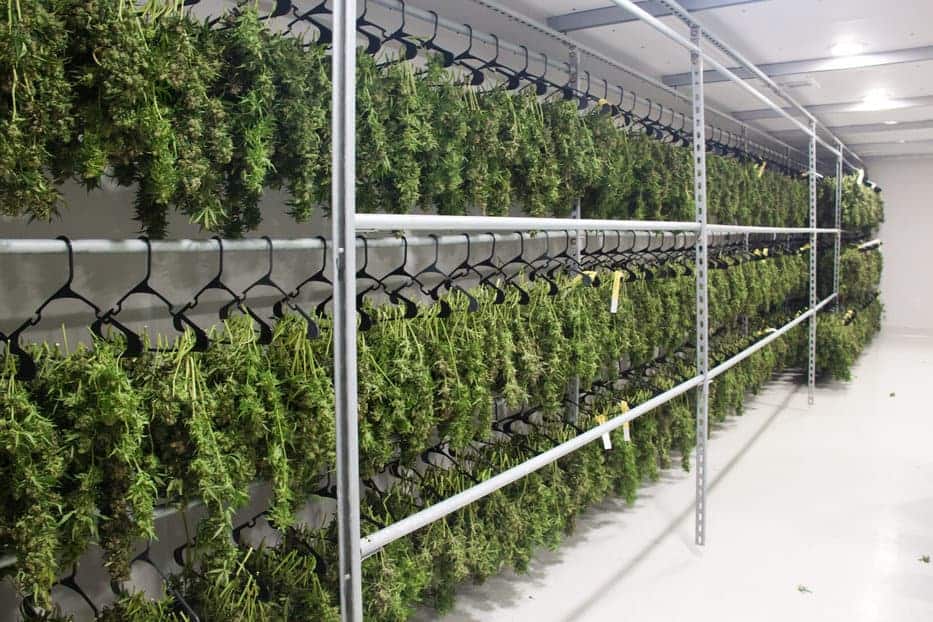
- Step 1: After harvesting your plants, cut each plant down into sectioned off branches (12-16”) and remove all the big fan leaves. Keeping them evenly spaced, hang these branches (wire hangers work well) so that each one gets a decent amount of airflow passing through it.
- Step 2: If you have a small grow tent, that’ll serve well as your drying room. Hang the branches in your drying room/tent with a small fan turned on low to keep the air moving.
- Step 3: Keep the room’s climate stable with a temperature between 60 and 70 F and relative humidity between 45 and 55%. The room doesn’t have to be pitch black, but it should be dark, so make sure there’s not much light leaking in.
- Step 4: You’ll know the buds‘ drying time is up when the flowers feel a little crunchy on the outside and the smallest branches snap instead of fold when you bend them. And remember, don’t rush through the process.
How to Quickly Dry a Sample Bud
We totally understand the pain you’re feeling to have to wait up to 15 days to try all those new strains while the buds dry (and even longer when you factor in the time to cure). The good news is that while the bulk of your crop dries and cures, you can speed up the process with a sample bud.
Quick-drying a bud or two can be done in a few different ways, like using a food dehydrator or the oven. Doing it in the oven is easier (especially since not all of us own a food dehydrator). Here’s how to do it:
- Trim your bud and lay it on a baking sheet lined with foil or parchment paper. If you’re quick-drying multiple buds, just make sure they’re evenly spaced.
- Preheat your oven to 125 degrees F. Once preheated, pop in the baking sheet.
- Set the timer for 8-10 minutes, 8 for small nugs and 10 for larger ones. Once the time is up, flip them on the tray and cook for another 5 minutes or so.
While this method is great for a bud or two, it’s not recommended for drying an entire crop. There are obvious things that can go wrong when you get the oven involved, and we wouldn’t want you to burn all that weed you worked so hard to create over the past few months.
Why hang plants upside down to dry?
The recommended way to store your buds while they dry is to cut 12 to 16-inch branches from the plants, remove the big fan leaves, and then hang the branches from string or wire upside down.
The thought process behind the upside-down hanging method is that the sap flow will continue and the plant will put its last energy into the buds. On top of that, it adds an extra layer of protection since the leaves tend to curl around the bud after a day or two or drying.
Tips for Hanging a Whole Plant to Dry
Most growers take the time to cut their plants down into smaller branches for drying. However, another option is to hang the entire plant.
This method isn’t just used out of laziness; it’s helpful for dry environments that don’t let you maintain that ideal 45 to 55% humidity level. Hanging whole plants helps the stems and branches hold water in addition to the buds, so it prevents you from drying too quickly.
If you have the opposite problem and are dealing with a too-humid climate, which is a major mold risk, you’ll definitely want to avoid whole-plant hanging. Instead, you’ll want to cut the branches into even smaller pieces since that’ll help them to dry faster (within that 7 to 10-day timeframe).
How to Dry Buds Without Hanging
You’ve also got the option to dry buds without hanging them at all. For this, you’ll cut the buds from the branches entirely and lay them flat onto a drying rack, like the Hydgooho Herb Drying Rack or the Neekor Herb Drying Rack.
Drying Racks
6 Tier Rack
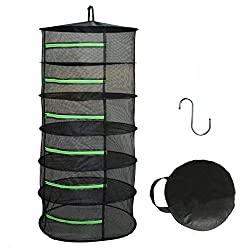
8 Tier Rack
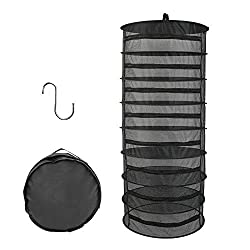
If you choose this route, make sure to keep a few inches of stem attached. That extra bit of stem is the best way to prevent the buds from getting too dry too fast.
Why do I have some crispy buds when drying?
While ideally all of your buds will be the same size and weight, that just doesn’t happen. Plants tend to give more energy to certain branches than others, and that leads to bigger buds, smaller buds, and some in between.
Bigger buds take longer to dry, and those small nugs dry a lot faster. That can lead to a crispy, crunchy texture, and too much crispiness means overdrying.
A simple test you can do for dryness is to take one of your bigger buds and put it in a sealed plastic bag or jar. Come back in an hour and if there is any moisture on the inside of the bag or the bud is suddenly damp to the touch, then let it dry more.
Curing Cannabis
The logic behind curing weed is just like curing meats – it’s all about preservation and maintaining flavour, smell, color, etc.
Whether you’re talkin’ meat or bud, curing has a lot of benefits, so you’ll always want to follow up with this step after cannabis drying.
Why should you cure marijuana?
The main reason behind this process is that it helps to preserve what you’ve worked so hard to cultivate. Unless stored the wrong way, cured weed is much less likely to go bad than uncured weed.
Although it takes time and will definitely test your patience, the other reason to cure is that this step is the key to drawing out the tastes and smells that only comes along with premium bud.
Does curing affect potency?
Absolutely, but in a good way. As long as it’s done properly, it increases the presence of cannabinoids.
That’s because curing converts cannabinoids like CBDA and THCA into their active forms, CBD and THC. The more time cannabis has to cure, the more of these conversions happen, and the more potent your bud will be.
What happens during curing?
During the cure process, the chlorophyll in the buds converts to sugars, and this is what gives marijuana its taste and aroma.
This period allows the trichomes – you know, that sticky frosty stuff on the leaves and buds – a chance to ripen. Just as a tomato tastes and smells better when it’s fully ripe, the same goes for marijuana.
By keeping the buds in a cool, dark, vacuum seal container, you’re giving the terpenes a chance to stay much more intact, and that’s ultimately what enhances the taste and smell. The longer you cure, the better, and a longer cure of 1 to 6 months means more potent buds and more smoothness.
If you’ve ever smoked weed that’s harsh, it probably wasn’t cured, at least not in the right way.
What factors affect the curing process?
Just as humidity, light, and temperature affect how the buds dry, it’s exactly the same as how they cure.
Light and Curing Weed
Light is one factor that can lead to the break down of valuable molecules like THC and terpenes. During the curing process, you’ll definitely need to keep your stash in a dark location.
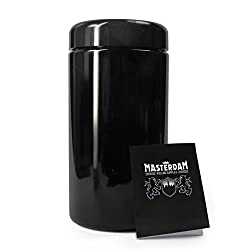
To avoid having light spoil the taste and potency of your flowers, keep your jars in a dark cupboard or box. You can also store your buds in Miron glass jars; Miron is a type of glass that filters out all visible light apart from violet, so it has an extra layer of protection from light that normal glass doesn’t offer.
Heat and Curing Weed
Heat is another factor that can lead to the break down of cannabinoids, which could potentially reduce the potency of your buds. High temperatures will only be an issue if you live in a climate where it gets overly hot, which isn’t usually a problem for us Canadians.
Be sure to keep your jars in a cool location to minimize damage and mold formation. An ideal room temperature for curing is around 21°C (just under 70°F).
Ideal Humidity Levels for Curing
The ideal humidity for this stage is 62%. Keeping the space within your curing container at an exact humidity might sound like an impossible task, but it’s actually super simple thanks to Boveda packs.
How to Cure Cannabis
While the reasons behind curing are simple – to preserve and boost potency, smoothness, taste, and smell – there are a few different methods you can use for how to cure marijuana.
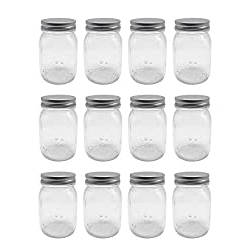
If you want to get a perfect cure every time and you’re all about convenience, you might want to think about using auto curing jars. An automatic system can be pricey though, especially considering cheap mason jars or extra large Zip Lock bags are great as large curing containers.
Curing Containers
Classic Mason Jars
Extra Large Bags

To go about curing buds for best taste and smell, here’s what to do:
Step 1
After your buds are properly dried, you’ll put them inside your containers. You can use Mason jars, but turkey bags work well since they’re clear and large enough to hold more than a pound of buds. They also breathe a little better than Mason jars and light-blocking Masterdam Jars.
Masterdam Light-Blocking Jars
Light-Blocking Jars
Whatever you use, you’ll only want to fill the container about 75 percent of the way to leave room for air. Air helps to break up sugars and byproducts that are released as the chlorophyll is being broken down, and this is what makes for a smoother product.
Once you’ve loosely stacked or packed the buds into your container, put the lid on the jar or seal the bag and store it in a cool, dark place.
Boveda Packs for Curing
Step 2
The ideal environment for curing is around 70°F (21°C), with 50–60 percent humidity. Controlling temp and humidity within your containers is the next step, and the easiest way to do it is with the Boveda 62% RH 2-Way Humidity Control Pack.
Boveda Packs for Humidity Control
Most Popular Humidity Control
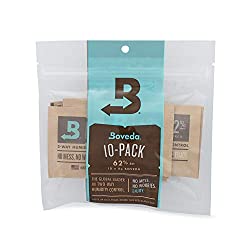
There’s literally a Boveda Pack for everything, so make sure you get the one that’s specific to “Herbal Medicine”, AKA cannabis. This pack helps to keep the humidity of your container at 62%, which is the ideal RH for curing, and it’s impossible for Boveda to over-humidify.
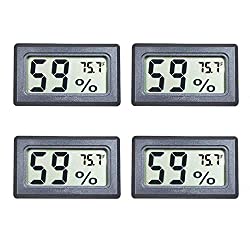
If you’re using a hygrometer, then you can put it inside your bags/jars to measure the humidity and temperature. It’s always a good idea to measure temp/RH with electronic temperature humidity meters, especially if you live anywhere that’s not considered a moderate climate.
Veanic Temperature Humidity Gauges
Reliable Mini Humidity Gauges
Step 3
Step 3 is the easy part. For about 1–2 weeks, you’ll just be checking your buds for mildew and mold. Do this at least once a day, more ideally 2-3 times per day.
During this monitoring stage, you’ll do something called “burping” your buds. This is when you take them out of the container to inspect them, remove any buds that look like they have problems, and put back the ones that are on track.
When you do this, try to change the buds‘ position in the container. This will help them cure more evenly. Also, try not to keep them out of the container for too long, just let them air out for a few minutes while you do a quick inspection.
Step 4
After two weeks or so, you can stop opening the containers every day. Now the risk of mold is a lot lower, so you only need to let the buds breathe once a week or so, not daily.
You can technically be done with the curing process after 2 weeks, but remember, the longer you cure, the better the buds. You can cure for as long as 6 months, any longer and you probably won’t improve the quality much more.
Just because you’ve decided to go all out with a 6-month cure doesn’t mean you can’t sample the buds along the way.
How do you get rid of mold on curing buds?
As far as getting rid of mold that you find on dried and cured buds, there really isn’t much you can do about it. Even if you’re tempted to cut it away with Fiskars, don’t even waste your time.
If there’s mold on one part of a nug, it will have already spread spores to every other part of the nug as well, so just toss it. This is why it’s important to inspect each bud as it cures, that way you can get rid of signs of mold before it spreads to the entire container.
Do buds tighten up when curing?
Yep, if you’ve gone through drying and cannabis curing the right way, then you’ll notice the buds will get denser and start to tighten up. Loose, airy buds aren’t ideal for anyone, and that’s exactly what you’ll get if you dry too quickly or don’t cure them properly.
Do commercial growers cure?
Many commercial growers don’t cure, but that’s because they’re trying to pump out as much product in as little time as possible. Real cannabis connoisseurs all agree that it’s doing the cannabis a disservice by not curing, especially when it comes to premium buds.
Think of it like aging good wine – cheap wine brands just pump out their products without even thinking about aging, but real wine connoisseurs know that aging a good bottle is crucial. It’s well worth waiting a little longer to get the best out of it.
Final Words on Drying and Curing Marijuana
The final word on drying and curing cannabis is that both steps are 100% necessary and worth the time. Whether you choose to dry with your plants hanging upside down on hangers or laying flat on drying racks and whether you cure in jars or bags is totally up to you.
Just make sure to spend the right amount of time on the drying and curing process. Sure, it’ll test your patience, but feel free to sample a few buds here and there along the way.

Reader Interactions